Imported and Exported Nodes
Importing nodes from an inlined file is accomplished with two statements: IMPORT and EXPORT. The IMPORT statement is used in the containing file to define which nodes of an Inline are to be incorporated into the containing file’s namespace. The EXPORT statement is used in the file being Inlined, to control access over which nodes within a file are visible to other files. EXPORT statements are not allowed in prototype declarations.
Example
Here is a simple example of including a EXPORT statement in an X3D file (Export.x3dv):
1
2
3
4
5
6
7
8
9
#X3D V4.0 utf8

DEF XFORM Transform {
  children Shape {
    geometry Cone { }
  }
}

EXPORT XFORM
The IMPORT feature allows authors to incorporate content defined within Inline nodes or created programmatically into the namespace of the containing file for the purposes of event routing. In contrast with external prototyping, which allows access to individual fields of nodes defined as prototypes in external files, IMPORT provides access to all the fields of an externally defined node with a single statement.
And now the appropriate file with the IMPORT statement (Import.x3dv):
1
2
3
4
5
6
7
8
9
10
11
12
13
14
15
16
#X3D V4.0 utf8

DEF INLINE Inline {
  url "Export.x3dv"
}

DEF TIMER TimeSensor { }

DEF INTERP PositionInterpolator {
  key [0, 1]
  keyValue [0 0 0, 3 0 0]
}

IMPORT INLINE.XFORM
ROUTE TIMER.fraction_changed TO INTERP.set_fraction
ROUTE INTERP.value_changed TO XFORM.set_translation
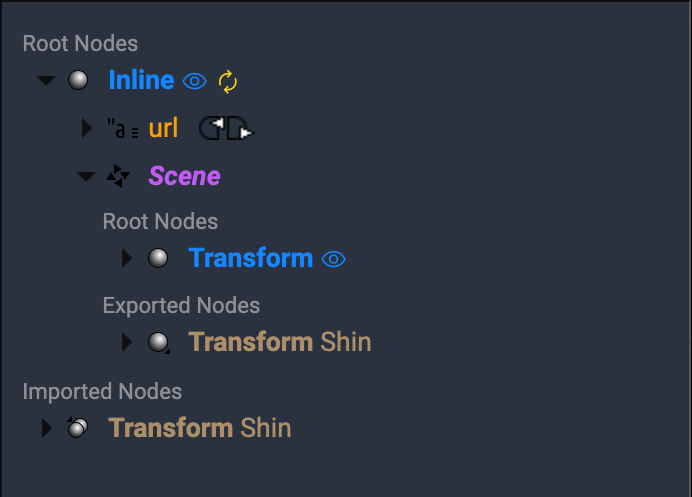
Imported and Exported Nodes within the Outline Editor
Imported nodes have an icon left beside the node type name with two spheres and a small arrow at the top left corner indicating that this node comes from another scene.
Exported nodes have an icon with a small arrow at the bottom right corner of the image left beside the node type name indicating that this node is an exported node and probably incorporated into another scene.
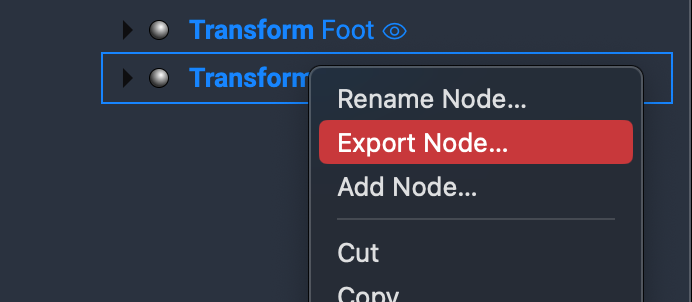
Exported Nodes
- Choose Context Menu > Export Node
- Specify a new name that will be used as identifier.
- The exported node will then appear at the bottom of your scene.
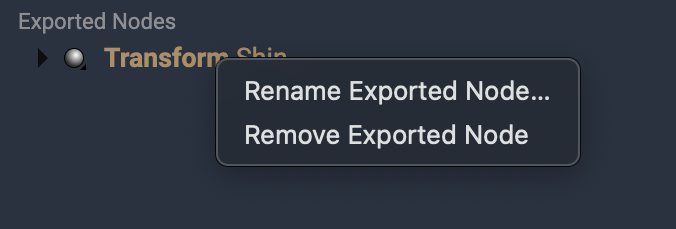
Remove Exported Node
You can always remove a previously exported node from the scene graph. Make sure it is not needed elsewhere.
- Choose Context Menu > Remove Exported Node.
Imported Nodes
If you have a scene with an exported node included in your scene with an Inline node, you can expand the Inline node’s scene to get access to the exported node.
- Choose Context Menu > Import Node.
- Give your imported node a new name to identify this node within your scene.
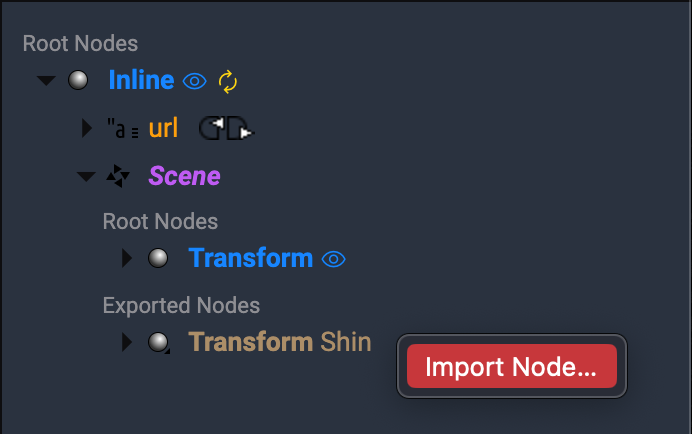
The imported node will then appear at the bottom of your scene. It is always possible to rename imported nodes, as well as to remove them. As the node has now been imported, it is now possible to create routes to and from this node, as well as references to it for use in the scene graph.