Creating Group Hierarchies
A group hierarchy specifies parent and child relationships within the group. The simplest group hierarchy occurs when you select objects and use Context Menu > Add Parent Group. This groups all the objects at the same level under a new parent, making the objects the children of the new parent. This grouping treats the separate objects as a single object with its own manipulator, so you can move and resize the objects as a whole. To create a multi-level group hierarchy, create multiple groupings using Context Menu > Add Parent Group. Also use drag & drop for nodes. Drag & Drop and Add Parent Group are described in detail below.
Group hierarchies are especially important when setting up animations for objects that are connected by joints; for example, the legs of a robot.
Context Menu > Add Parent Group
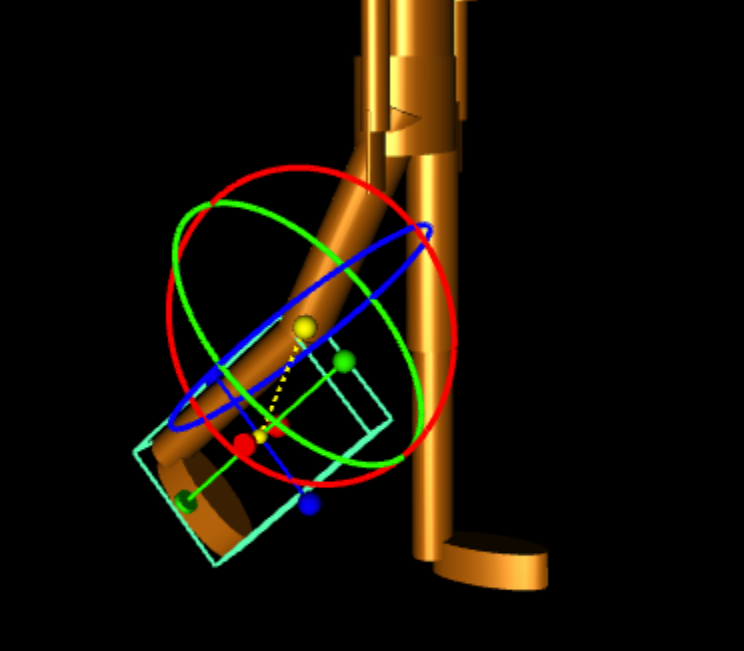
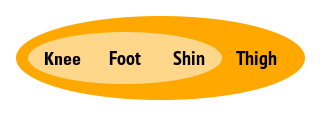
In an example using a robot leg made up of a foot, shin, and thigh, a simple group looks like this:
The orange area represents a parent Transform node which holds the children (three Transform nodes containing information for the Foot, Shin, and Thigh).
The Outline Editor might display this grouping as:

This type of group will allow you to move the foot, shin, and thigh as a single unit.
But you want to do something more complex: Suppose you want to move just the foot, then the shin with the foot:
And you also want the thigh movement to include the shin and the foot:
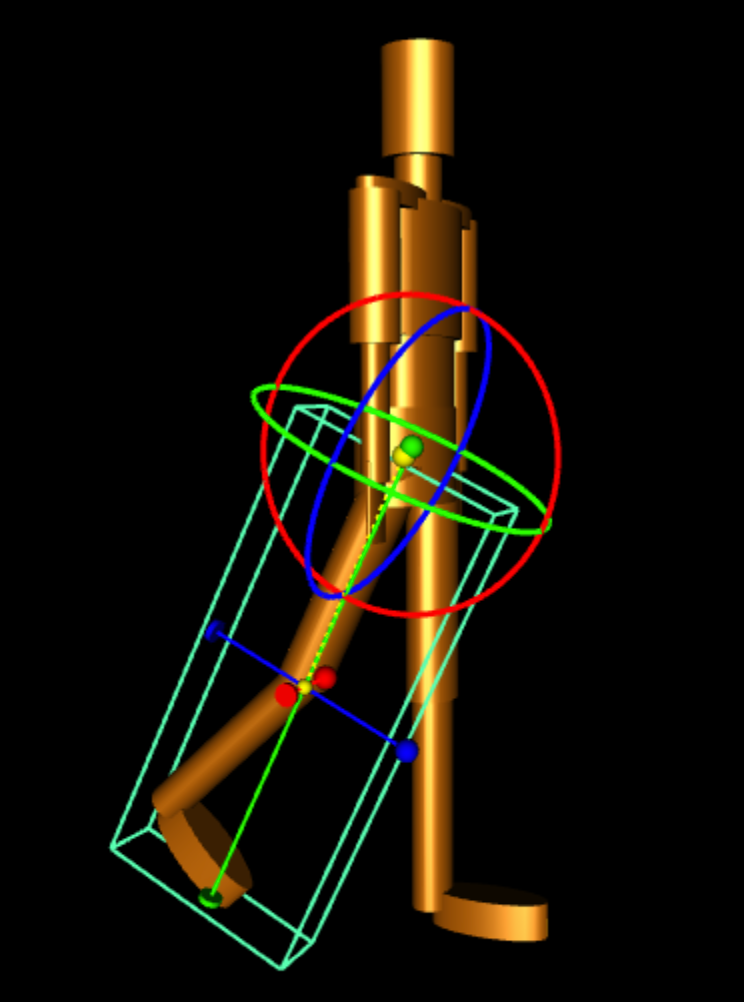
You’ll need to group the foot and shin together, then add the thigh as a separate group containing both the foot and shin. The steps for this operation follow:
- Select foot and shin.
- Choose Context Menu > Add Parent Group > Transform.
The outcome produces a group hierarchy that looks like this:
The Outline Editor might display this grouping as:

This type of grouping lets you easily articulate the robot leg. For instance if you want to animate this group hierarchy.
Drag & Drop
Suppose that you want to add a knee to the robot leg described in the previous section. For this, you’ll add the knee to the existing foot and shin group so that all three of these objects move together.
- Choose the knee.
- Drag & drop the knee into the parent group alongside with the foot and shin.
The outcome produces a group hierarchy that looks like this:
The Outline Editor might display this grouping as:

Animating Objects with Parent Groups
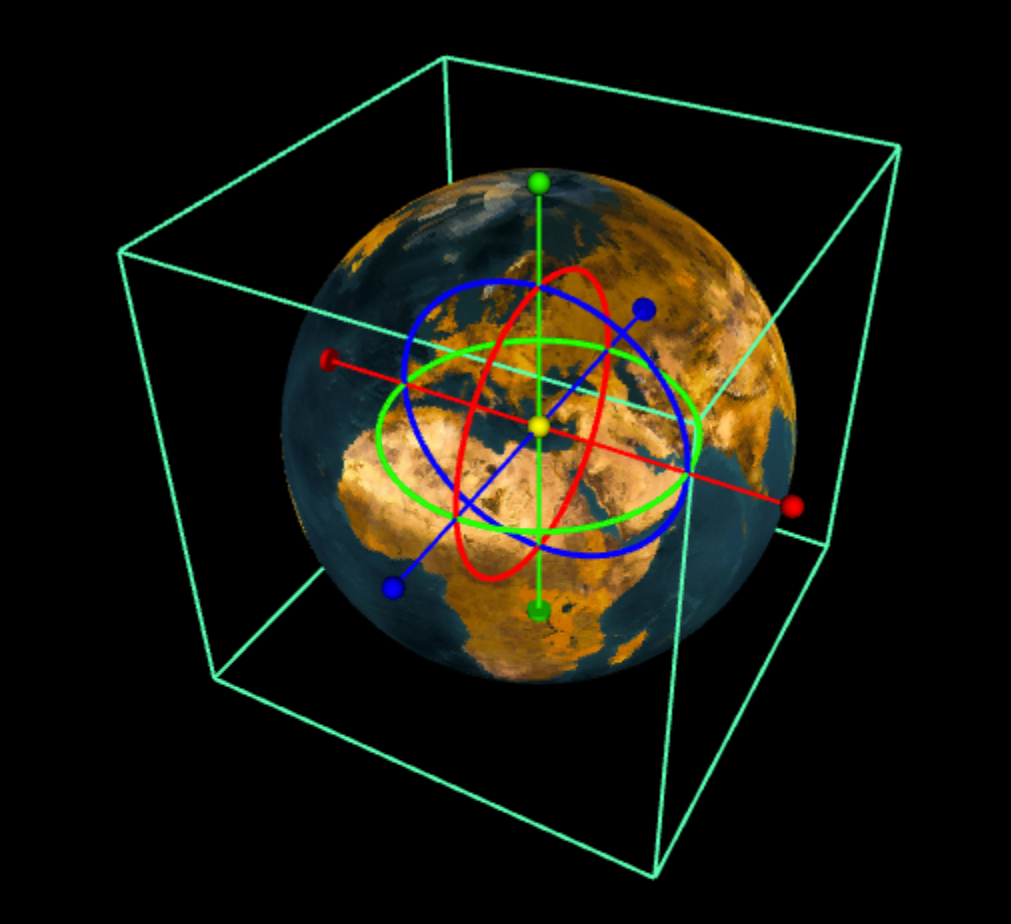
In some cases you’ll want to create a parent group. For example, suppose you are creating an animation of the Earth’s rotation. The Earth spins around its own axis and it also orbits the Sun. You can create a parent group to specify the Sun’s rotation that includes the rotating Earth:
- Select the Earth.
- Choose Context Menu > Add Parent Group > Transform.
The parent group has its own manipulator with its own center of rotation (the yellow point). You can move this center if you select it, and drag one of the axis manipulators.
When you create an animation, use the Select Parent and Select Child buttons (not yet implemented) to toggle between the Earth’s local rotation (the child selection) and its rotation around the Sun (the parent selection) or use the Outline Editor.
Select Child to set the Earth’s local rotation.
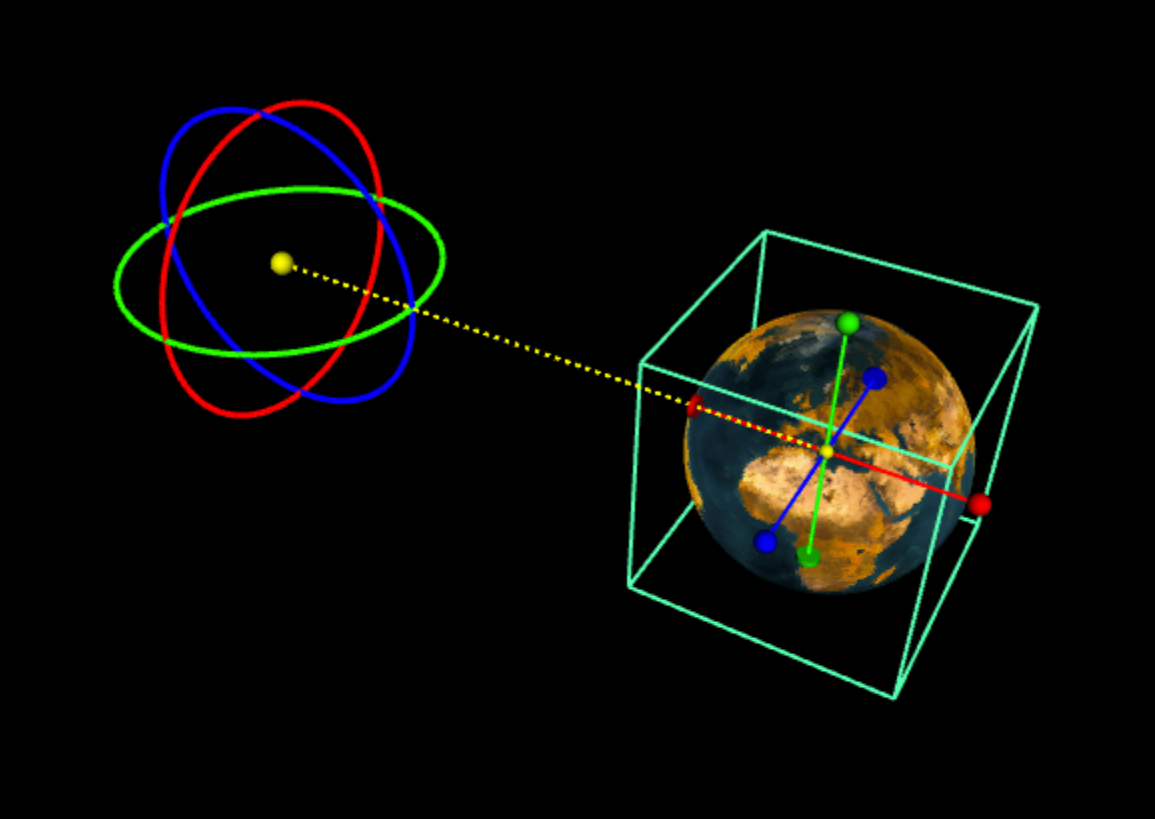
Select Parent to set the Earth’s rotation around the Sun. Select the center, to move the center of rotation away from the parent’s manipulator. You can select the center to pin it to it’s current location. The center point is then colored blue. You can then move the object but the center stays at its current location. Click the center again to release.