Getting Started
Overview
X_ITE is a new 3D JavaScript library entirely written in JavaScript and uses WebGL for 3D rendering. Authors can publish X3D and VRML source online within an HTML5 page with X_ITE that works with Web browsers without prior plugin installation. This gives X3D authors the ability to displays content in 3D, using WebGL 3D graphics technology to display X3D content in several different browsers across several different operating systems. Since X3D is backwardly compatible, X_ITE can also be used as a VRML viewer.
X3D is an ISO-ratified, royalty-free open standards file format and run-time architecture to represent and communicate 3D scenes and objects specified by the Web 3D Consortium. X3D has evolved from its beginnings as the Virtual Reality Modeling Language (VRML) to the considerably more mature and refined ISO X3D standard. X3D provides a system for the storage, retrieval and playback of real time 3D scene in multiple applications, all within an open architecture to support a wide array of domains and user scenarios.
X_ITE supports custom shaders, clip planes, reflection mapping, script nodes, prototyping capabilities and event driven programming to provide you with an improved quality level of virtual effects and tools ready for the Internet.
Tip: X_ITE runs best in fresh installs of Google Chrome, Chromium, Firefox, Safari, Opera, and Microsoft Edge. X_ITE uses the latest JavaScript standard, but is also compatible with older browser, and is available both on your desktop computer and on your modern smart-phone.
If you ever get into trouble, please report a bug. If you have any questions or need help please open a new issue.
Become a Patreon of X_ITE
Yeah, tell me!
X_ITE needs your support, with a small contribution you can make a big difference. To support us, have a look at https://patreon.com/X_ITE.
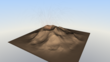
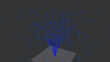
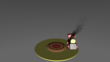
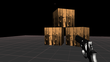
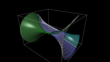
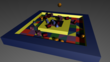
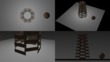
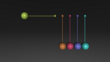
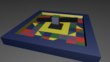
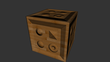
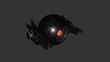
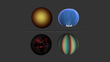
X3D Examples
 |  |  |  |  |  |  |
 |  |  |  |  |  |  |
 |  |  |  |  |  |  |
 |  |  |  |  |  |  |
 |  |  |  |  |  |  |
 |  |  |  |  |  |  |
 |  |  |  |  |  |  |
 |  |  |  |  |  |  |
 |  |  |  |  |  |  |
 |  |  |  |  |  |  |
 |  |  |  |  |  |  |
 |  |  |  |  |  |  |
 |  |  |  |  |  |  |
 |  |  |  |  |  |  |
 |  |  |  |  |  |  |
 |  |  |  |  |  |  |
 |  |  |  |  |  |  |
 |  |  |  |  |  |  |
 |  |  |  |  |  |  |
 |  |  |  |  |  |  |
 |  |  |  |  |  |  |
 |  |  |  |  |  |  |
 |  |  |  |  |
Note: The VolumeRendering examples are only working if your browser supports WebGL 2, otherwise the examples left black.
Download X_ITE v9.6.0
There is a ZIP archive available to locally install X_ITE on your server. Compressed and uncompressed copies of X_ITE files are available. The uncompressed file (x_ite.js) is best used during development or debugging; the compressed file (x_ite.min.js) saves bandwidth and improves performance in production.
Using X_ITE with a CDN
CDNs can offer a performance benefit by hosting X_ITE on servers spread across the globe. This also offers an advantage that if the visitor to your webpage has already downloaded a copy of X_ITE from the same CDN, it won’t have to be re-downloaded. To use the X_ITE CDN, just reference the JavaScript file in the script element directly from the jsDelivr CDN or GitHub CDN domain.
jsDelivr CDN
jsDelivr is an open-source content delivery network (CDN) renowned for its no-cost access, swift performance, and reliable service.
For Production
If you use X_ITE for production and everything works well, you should use a fixed version. You can get a list of all available versions here on npm.
1
2
3
4
5
<script src="https://cdn.jsdelivr.net/npm/x_ite@9.6.0/dist/x_ite.min.js"></script>
<!-- or as ES module for use in scripts -->
<script type="module">
import X3D from "https://cdn.jsdelivr.net/npm/x_ite@9.6.0/dist/x_ite.min.mjs";
</script>
Info: It is no longer necessary to include the CSS file.
Latest Stable Version
You can opt for the »latest« tag to ensure you always have the most recent version, instead of using a fixed version number.
1
2
3
4
5
<script src="https://cdn.jsdelivr.net/npm/x_ite@latest/dist/x_ite.min.js"></script>
<!-- or as ES module for use in scripts -->
<script type="module">
import X3D from "https://cdn.jsdelivr.net/npm/x_ite@latest/dist/x_ite.min.mjs";
</script>
GitHub CDN
GitCDN serves raw files directly from GitHub with proper Content-Type headers and a super fast CDN!
Latest Stable Version
By making sure you have the latest stable version, you can take advantage of the latest features, enhancements and bug fixes to keep your work at the highest level of performance and functionality.
1
2
3
4
5
<script src="https://create3000.github.io/code/x_ite/latest/x_ite.min.js"></script>
<!-- or as ES module for use in scripts -->
<script type="module">
import X3D from "https://create3000.github.io/code/x_ite/latest/x_ite.min.mjs";
</script>
You can also get it from npm
You can find more information about x_ite on its npm page.
To install, use the following command:
1
$ npm install x_ite
Maybe you are curious now how to use X_ITE with Electron?
Embedding X_ITE within a Web Page
To display your X3D scene in a HTML5 page, you must first obtain a file in one of the supported formats.
The HTML5 page is quite easy to create, the HTML5 code below shows you the minimum requirements. The path to the X3D scene is specified in the src attribute of the <x3d-canvas> element.
1
2
3
4
5
6
7
8
9
10
11
12
13
14
15
16
<!DOCTYPE html>
<html>
  <head>
    <meta charset="utf-8">
    <script src="https://cdn.jsdelivr.net/npm/x_ite@latest/dist/x_ite.min.js"></script>
    <style>
x3d-canvas {
  width: 768px;
  height: 432px;
}
    </style>
  </head>
  <body>
    <x3d-canvas src="path/to/your/X3D/world.x3d"></x3d-canvas>
  </body>
</html>
To get X_ITE working you need to include the JavaScript file »x_ite.min.js«. Once X_ITE has loaded successfully, a new HTML element <x3d-canvas> will be available on your page. You can style the <x3d-canvas> element with CSS just like any other HTML element, and you can place it anywhere in the DOM tree. Once the scene is displayed, you may wonder how to navigate in the scene.
Tip: To test a page locally on your desktop computer, setup a localhost server to load files via src attribute or Inline node, or directly combine HTML with X3D.
Supported File Formats
X_ITE can load several file formats, either directly as the source of the <x3d-canvas> element or as the source of an Inline node, as well as using API methods of the Browser object. Foreign formats such as glTF are converted internally to X3D and then made available to the scene graph.
| Encoding | File Extension | MIME Type |
|---|---|---|
| X3D XML | .x3d, .x3dz | model/x3d+xml |
| X3D JSON | .x3dj, .x3djz | model/x3d+json |
| X3D Classic VRML | .x3dv, .x3dvz | model/x3d+vrml |
| VRML | .wrl, .wrz | model/vrml |
| glTF | .gltf, .glb | model/gltf+json |
| Wavefront OBJ | .obj | model/obj |
| STL | .stl | model/stl |
| PLY | .ply | model/ply |
| SVG Document | .svg, .svgz | image/svg+xml |
Tip: All files can be compressed using GZip compression (usually denoted by a ‘z’ at the end of the filename suffix). This saves bandwidth and speeds up download time.
If you have an own web-server see how to configure your web server. If you are looking for an online X3D file format converter see here.
Fallback Content
The <x3d-canvas> element is equal to the <canvas> element in that, it is easy to define some fallback content, to be displayed in older browsers not supporting it. You should always provide fallback content to be displayed by those browsers.
Providing fallback content is very straightforward: just insert the alternate content inside the <x3d-canvas> element. Browsers that don’t support <x3d-canvas> will ignore the container and render the fallback content inside it. Browsers that do support <x3d-canvas> will ignore the content inside the container, and just render the canvas normally.
For example, we could provide a text description of the X3D element or provide a static image of the dynamically rendered content. This can look something like this:
1
2
3
<x3d-canvas src="world.x3d">
  <p>Current stock price: $3.15 +0.15</p>
</x3d-canvas>
1
2
3
<x3d-canvas src="world.x3dv">
  <img src="images/clock.png"/>
</x3d-canvas>
Attributes of the <x3d-canvas> Element
The HTML <x3d-canvas> element defines the main content of the X3D document. The <x3d-canvas> element has several attributes that define different behaviors. All of these attributes are optional and all can be changed during runtime except preserveDrawingBuffer.
- antialiased
- A Boolean value (
trueorfalse) to indicate whether rendering should use hardware antialiasing if available. The default value for the antialiased attribute istrue.
Tip: Set CSS property »image-rendering« of <x3d-canvas> element to »pixelated«, if no filtering is desired in addition.
- baseURL
- A String value containing the URL against which relative URLs are resolved. By default, this is the address of the web page itself. Although this feature is rarely needed, it can be useful when loading a
data:orblob:URL with the src attribute, or withBrowser.loadURL, or when usingBrowser.createX3DFromString. The value of baseURL will only be used with the external browser. - cache
- A Boolean value (
trueorfalse) to indicate whether files transferred over the internet should be cached on the local computer. The default value for the cache attribute istrue. It works by appending “_={timestamp}” to the GET parameters of every request. - contentScale
- A Float value that specifies how much higher the physical resolution of the internal <canvas> element is. The default value for the contentScale attribute is
1.0, which is sufficient for most cases. A higher value increases the resolution of the internal <canvas> element and can be used to increase the anti-aliasing effect, making the rendered image sharper. If set toauto, contentScale will match »window.devicePixelRatio«, which is useful for HiDPI or Retina displays. A value between0.0and1.0will result in a pixelated image, see also the antialiased attribute. - contextMenu
- A Boolean value (
trueorfalse) to indicate whether a context menu should be displayed on right click. The default value for the contextMenu attribute istrue. The context menu can also be extended, see here. - debug
- A Boolean value (
trueorfalse) to indicate whether additional debug message should be printed into the web browsers console and whether additional context menu items should be enabled. The default value for the debug attribute isfalse. - multisampling
- An Integer value that specifies the number of samples used by multisampling. The default value is 4, which is sufficient for most cases. A higher value increases the effect of anti-aliasing. Check the rendering property »MaxSamples«, which is browser dependent.
- notifications
- A Boolean value (
trueorfalse) to indicate whether the notification bubble should be displayed. The default value for the notifications attribute istrue. - onerror
- Type: script code. This event is sent to an <x3d-canvas> element when an error occurs loading a scene.
- oninitialized, onload
- Type: script code. This event handler will be called on the <x3d-canvas> element when a scene has finished loading. This applies whether the scene is applied via the src attribute or when a scene is loaded or replaced by another world. If you change the scene, the event will fire again when the new scene loads. This event will not bubble up the element tree.
The onload event handler will also be called at the very beginning when the initial empty scene is loaded.
- onshutdown
- Type: script code. This event handler will be called on the <x3d-canvas> element when a scene is unloaded or replaced by another world.
- preserveDrawingBuffer
- A Boolean value (
trueorfalse). If the value is true the drawing buffers will not be cleared and will preserve their values. The default value for the preserveDrawingBuffer attribute isfalse. Set preserveDrawingBuffer totrueif you want to save the image from the internal canvas. Keep in mind setting preserveDrawingBuffer to true can have performance implications. - orderIndependentTransparency
- A Boolean value (
trueorfalse) to indicate whether order independent transparency rendering technique should be used. The default value for the orderIndependentTransparency attribute isfalse. Can slow down rendering speed if antialiased istrue, but can be used in conjunction with contentScale. - splashScreen
- A Boolean value (
trueorfalse) to indicate whether the splash screen should be displayed. The default value for the splashScreen attribute istrue. The display of the splash screen can also be toggled via the browser option »SplashScreen« in JavaScript. CallBrowser .setBrowserOption ("SplashScreen", booleanValue)to toggle the display of the splash screen. - src
- A String value containing the URL to load on page load. If no src attribute is specified or the src attribute is empty, an empty scene will be displayed.
- timings
- A Boolean value (
trueorfalse) to indicate whether the Timings Panel should be displayed. The default value for the timings attribute is restored from the previous session, otherwise it isfalse. - update
- A Boolean value (
true,falseorauto) to indicate whether browser events should be processed. The default value for the update attribute istrue. A value oftruewill enable event processing, a value offalsewill stop event processing. If the value isauto, the effective value is determined by the visibility of the <x3d-canvas> element. - url
- An MFString value of URLs to load on page load. If no url attribute is specified or the attribute is empty, an empty scene will be displayed. If both src and url attributes are given, the last given attribute takes precedence.
Example of Use
1
<x3d-canvas src="path/to/your/X3D/world.x3d" cache="true" update="auto"></x3d-canvas>
More Options
More options can be adjusted using the Browser object and Browser Options for scene specific adjustments.
Keyboard Shortcuts
If the <x3d-canvas> element is focused, the following keyboard shortcuts are available.
- Home (Pos 1)
- Go to first viewpoint.
- End
- Go to last viewpoint.
- Page Up
- Go to previous viewpoint.
- Page Down
- Go to next viewpoint.
- Ctrl++
- Display browser timings.
- Shift+F8
- Copy the the current viewpoint of the active layer to clipboard.
- Ctrl+S
- If <x3d-canvas> attribute debug is
true, toggle begin/end update of browser. - Ctrl+1
- If <x3d-canvas> attribute debug is
true, set shading to POINT. - Ctrl+2
- If <x3d-canvas> attribute debug is
true, set shading to WIREFRAME. - Ctrl+3
- If <x3d-canvas> attribute debug is
true, set shading to FLAT. - Ctrl+4
- If <x3d-canvas> attribute debug is
true, set shading to GOURAUD. - Ctrl+5
- If <x3d-canvas> attribute debug is
true, set shading to PHONG.
Extending the Context Menu
The context menu is the jQuery Context Menu plugin, and it can be extended using the items syntax. The full documentation can be found here.
Example
1
2
3
4
5
6
7
8
9
10
11
12
Browser .getContextMenu () .setUserMenu (function ()
{
  return {
    "command-1": {
      name: "Command 1",
      callback: function (event)
      {
        console .log ("Clicked on Command 1");
      },
    },
  };
});